
With more people than ever in the bush these days, backpacking is a great way to get into some productive country. Great advice from Zach Spark.
Overview
Backpack hunting has dramatically increased in profile and participation over the past few years, particularly in Victoria’s Alpine National Park. With more people than ever in the bush these days, Backpacking is a great way to get into some productive country- although starting out can be daunting for many. Conflicting theories, internet forum guru’s and magazine articles abound, but what are the fundamentals to this extremely rewarding form of hunting? The following tips assume you, the reader have a basic level of fitness, no serious health issues & a good idea of what to expect in the hills.
Clothing and boots
Do: Prioritize with boots, base layer & outer shell
Don’t: Get sucked in to marketing hype- keep it simple
Backpack hunting starts with what you will wear on day one, as you will more than likely still be wearing this outfit on your last day. I would urge every aspiring backpack hunter to look to the bushwalking community for advice and stick with light weight woollen base layers, with simple light weight outer layers and a packed away outer shell for rain/wind protection. How much you spend is entirely up to you, I prefer to stick to well established quality branded gear for the base layer and outer shell with simple polar fleece in between.
Shorts rather than pants are a great thing to wear over a thermal base layer as your movement will be uninhibited by swishing pants that grab on things and you will more often than not walk yourself dry.
For warmer weather, a simple khaki work shirt over the top of a woollen base layer will wick away the sweat and dry quickly- leave the flash synthetic camo at home and think about comfort over style. Boots are critical to enjoying your hunt, again spend as much or as little as you like, however I have been through many pairs of cheap boots and until I purchased European Purpose built hiking boots I always had wet feet. I can’t remember the last time I had wet feet since investing in premium boots. Don’t forget good socks & canvas gaiters to complement good boots and always take 1-2 spare pairs of socks- I stick to woollen blend work socks as they are warm, breathe well and the price is right!
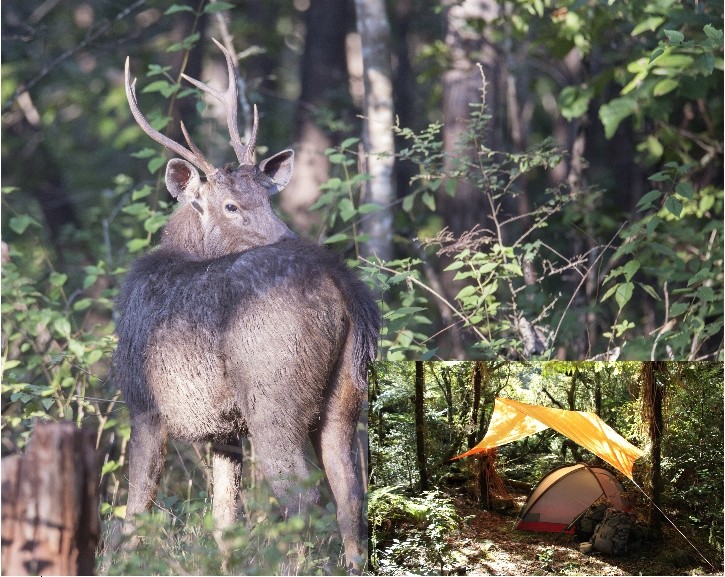
Sleep System and Shelter
Do: Invest in the best sleep system you can afford, with a robust lightweight tent
Don’t: Rush in and purchase inferior gear- “buy once, cry once”.
Next on my priority list is a sound sleep system and shelter. Ignore the temperature range when sleeping bag shopping and look at fill weight as your main focus. 750grams-1000grams of down is the ideal range for southern Australian Conditions; a cold nights sleep will affect your mood and performance throughout the trip. Next up is a down filled sleeping mat- as thick as you can justify (I got a 7cm model). This item will go as far as any other item you can purchase in creating an enjoyable experience rather than burning all your gear when you get home. Do not skimp on these items as they will potentially save your life one day “when everything goes wrong.”
I’ll focus on tents next, as I feel Bivvy bags are more specialised and not as suitable for those starting out. My tent is 10 years young and still going strong. I bought it when I had basically no idea what I was looking at and as a result I’ve had mixed experiences with it. On the plus side it’s extremely rugged, roomy and lightweight, but on the negative side, the vestibules are next to useless, making life difficult when getting in and out of the tent in the rain. If I had my time again I would invest in a simple 2 or 3 man tunnel tent with an oversize vestibule to store boots and gear in. Tent selection for Australian Conditions is a lot simpler than places like the US and NZ as we generally don’t have the extremes in weather that they experience. A well built and modestly priced 3 Р3 1/2 season tent will suffice for most conditions a backpack hunter will find himself in Down Under.
Backpacks
Do: Try on your chosen pack, fully loaded BEFORE purchasing- seek professional advice.
Don’t: Buy a pack that is too large. The bigger the pack, the more gear you will be tempted to pack.
Believe it or not I don’t place a huge amount of emphasis on this part. There is simply no “Silver Bullet” when it comes to backpack selection, as any $600 pack could give you muscle cramps at the end of the day, whereas the $200 no-frills model may fit you like a custom. My only advice is to put all your gear in a duffel bag and head into a good outdoor shop to discuss backpacks with someone experienced and un-biased. You will be surprised at what you end up with by the end of the day after you’ve tested a few packs out (it’s worth calling ahead rather than ambushing the store with your smelly hunting gear).
A simple 50-65 litre canvas internal frame pack will carry enough gear for up to a week with careful prep, as well as allow enough room to pack out the first cuts of boned out venison. 65+ litre packs quickly become unsuitable, remember you’re not walking defined trails sucking your thumb with a tour group on your way to a hut. You are most likely scrambling up ridges and crossing creeks on your way to pristine back country. With larger pack size, comes the issue of extra weight, I try to limit myself to 15-20Kgs fully loaded and watered with the mentality of heading in light and coming out heavy. This will take some discipline to achieve, but keep this in mind when packing- if you think you might need it, you probably don’t.
Food & Water
Do: Create a daily menu plan and try to stick to basic nutritional foods
Don’t: Under-estimate how much you will eat and drink, going hungry or thirsty will ruin your hunt
This is probably the simplest area of Backpack hunting in my opinion and a highly personal decision where everybody has their preferred route. Cooking gear should be kept to a minimum, with a simple alcohol burner stove and “Spork” being all you really need for an extended stay in the hills. Take only one primary knife with a pocket sharpener and use it for cooking, gutting, skinning and whittling. Knives are heavy, so think smart and leave your Bowie knife at home; you only really need a solid 2 ½” drop point blade 99% of the time.
Onto food and when it comes to menus, I think generally there are generally three types of people:
Over prepared annoying types Рhe’s got a little skirt bottle of olive oil, paper towel & a non stick pan. He fries two carefully wrapped eggs and a pre-trimmed rasher of bacon every morning, garnished with parsley and washes it all down with percolated coffee he made in some weird little pot thing. You stare at him with envy and pray he chokes on those damn eggs.
Under prepared frustrating types Рhe’s got muesli bars, six cans of Coke, a few sachets of peanut butter & 2 3 days old whoppers- salad removed. You stare at him with contempt and pray he doesn’t ask you for anything.
Somewhere in the middle types – you pack some porridge for breakfasts, muesli bars for snacks and scroggin for a treat. A few wet meals for dinner, a few dehydrated meals for back up and maybe some flatbread to wipe up you bowl, all washed down with some sweet black tea and maybe a nip of something a bit stronger in the evening.
Remember freeze dried meals are only really an advantage if you have access to water. A lot of the time you will be sleeping on the tops so you need to carry up all your water. Always be careful of water in the mountains, I am very reluctant to drink un-treated creek water, but happy to slurp up water from a hillside spring (usually a good last stop to fill up on your way up a ridge). Always allow for 3 litres per day per person minimum and drop in a few purification tablets if there is ANY doubt about the waters source. If you run out, make it a priority head back down hill and fill up.
Safety
Do: Take the time to put together a comprehensive, sealed first aid kit
Don’t: Leave home without it!
It goes without saying that the further you venture into the hills; the more you will be exposed to risk. Things like hypothermia, falls, snakebite & de-hydration will be some of the most dangerous situations you may find yourself on the end of, but these hazards can be all but avoided with careful preparation and awareness of your surroundings. A simple first aid kit should be a permanent fixture in your backpack, with special focus on compression bandages, extra water purification tablets, anti-inflammatory tablets & decent pain killers. An emergency bivvy around the size of a toilet roll is also a great idea as a “last line of defence” and also signalling device (orange or silver type).
Competency with a Topographic map and Compass is mandatory before going bush as technology cannot be relied on. Always refer to a map when times are good and everything is working, so that when it all goes “pear shaped” you know where you are and how to get home. Competent Map reading will help no end at night when you are planning your next day’s hunt, as 2 people can read and discuss points of interest easily without wasting GPS unit batteries.
EPIRB’s are recommended for hunters with any concerns heading up the hill. Weather Conditions or a nasty fall can have even an experienced hunter panicking quicker than you can say, “I should have taken up golf!” These units have come down in price significantly over the last 5 years and will keep the wife happy (as happy as can be anyway) knowing you are locatable should an emergency arise- she can then take you apart, piece by piece for being so stupid.
Toys
Do: Think carefully about your rifle combination. A simple, smooth feeding hunting rifle on the lighter side is ideal
Don’t: Neglect your practice; Remember there ain’t no benches in the bush- so focus on field shooting positions at the range.
This is everybody’s favourite section, but also the least important as far as having a great time bush-whacking & arriving home safely. The most important piece of kit that will fill your freezer is not your rifle; it’s the glass you have jammed against your face 75% of the time you are in the hills. A good set of Binoculars WILL increase your success rate if they are used effectively (a whole other topic). The gap between high end European glass and cheaper glass has shrunk significantly in recent years, although for quality- go European all the way and purchase the best glass you can possibly afford.
A good quality waterproof LED headlamp will also pay dividends every day you’re in the bush. These little wonders are invaluable when hiking back to you fly camp in the evening after a hunt and for preparing meals etc. I rarely light a fire of any sort when backpack hunting. Although many believe it doesn’t bother the deer; I prefer to stack as many odds in my favour as possible and rely on a headlamp only for light in the evenings/mornings.
Rifles are highly personal, but a few rules of thumb should be applied. Well built bolt action rifles with synthetic stocks reduce maintenance in the field and tears at home. Reasonably light rifles should be chosen to reduce fatigue, although too light can be counter-productive for the average hunter as they can be difficult to shoot. My main deer rifle is a 270 Winchester weighing in at 7.48 pounds slung & loaded with a full magazine. It is a joy to carry in the hills and has a simple lightweight 3×9 variable scope on top. With a pocket sized rangefinder on my hip at all times, I can take advantage of the 270‚Äôs long legs- as well as flatten deer up close with authority using this combination.
Practical accuracy is a no brainer, with most production rifles today capable of extremely good accuracy with a minimum of effort. Keep bullet/ammunition selection simple (done to death online and in print) and choose an “all-round” projectile that will ethically harvest deer at whatever range you plan to shoot and remember this- you are likely to come across deer when you least suspect it, so leave the long range target bullets at home and stick to purpose built hunting bullets. As always there is no free lunch when deer hunting, so practice with your rifle is essential to success & this can make or break your trip.
Summary
Hopefully, both new and experienced backpack hunters can take something away from this article, although it is only a brief summary. Backpack hunting can be as difficult or as simple as you like it to be, it’s a very personal experience with no hard and fast rules. My focus has always been on robust, reasonably lightweight gear at the expense of luxury items and trinkets. Safety should always be paramount, as there is usually no easy way out of the bush. Being comfortable and self sufficient is key to spending as much daylight as possible hunting rather than struggling. Stay safe and see you on the hill.
Addendum: Author’s Packing List
Backpack (Eberlestock Dragonfly)
Tent (Mountain Designs)
Sleeping bag (Macpac)
Sleeping mat (Exped)
Trangia stove (contains spork and extra lighter)
Fuel bottle
Flask
Outer shell rain jacket (First Lite)
Snack pack
First aid kit
Spare socks
Knife (Svord)
Lighter
Electrical tape
GPS (Garmin)
Topo map (not telling!)
Spare cartridges
Rangefinder (Redfield)
Binoculars (Meopta)
*Not Shown
Food (packed specifically prior to leaving)
Water (3 litre hydration bladder in the pack)
Knife Sharpener (can’t find the bloody thing!)
Optional
Down jacket/vest (depending on weather)
Spare thermals (depending on weather)
Fly (depending on weather)


0 Comments